多线程与回调函数
需要下载一个 cpp-httplib ,下载到 workspace/src/demo_one_pkg/include/
下载后得到如下文件
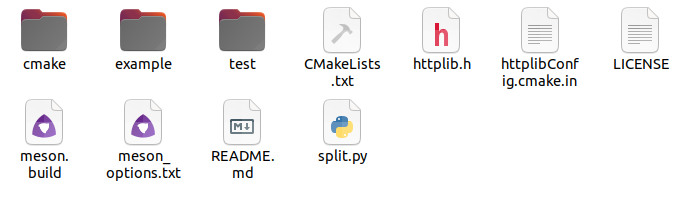
下载好之后,修改 demo_one_pkg 的 CMakeLists 文件
2
include_directories(include)
接着,在 demo_one_pkg/src 下创建 learn_thread.cpp,内容如下
2
3
4
5
6
7
8
9
10
11
12
13
14
15
16
17
18
19
20
21
22
23
24
25
26
27
28
29
30
31
32
33
34
35
36
37
38
39
40
41
42
43
44
45
46
47
48
49
50
51
52
53
54
55
56
57
58
59
60
61
62
63
64
65
66
class Download{
private:
public:
// 下载函数,负责下载文件并调用回调函数
// host 主机, path 路径,回调函数
void download(const std::string& host, const std::string& path, const std::function<void(const std::string &, const std::string &)> &callback_word_count){
// 输出当前线程ID,便于调试
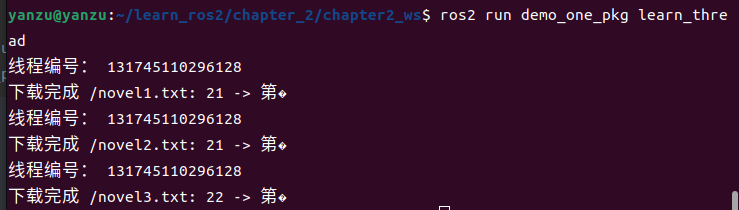
std::cout << "线程编号: " << std::this_thread::get_id() << std::endl;
// 创建客户端对象,指定主机
httplib::Client client(host);
// 发送 GET 请求,获取文件内容
auto response = client.Get(path);
// 如果请求成功且状态码为200
if(response && response->status == 200){
// 调用回调函数并传递文件内容
callback_word_count(path, response->body);
}
};
// 启动下载函数,使用 std::async 异步执行下载任务
void start_download(const std::string& host, const std::string& path, const std::function<void(const std::string &, const std::string &)> &callback_word_count){
// 函数包装器进行包装
// auto download_fun = std::bind(&Download::start_download, this, std::placeholders::_1, std::placeholders::_2, std::placeholders::_3);
// 创建线程
// std::thread thread(download_fun, host, path, callback_word_count);
// 等待线程结束
// thread.join();
// 直接通过 std::async 可以异步执行任务,同时它会返回一个 std::future 对象,保证任务的异步执行,而主线程会等待任务完成
// std::launch::async 会指示 std::async 强制使用新的线程执行任务
auto future = std::async(std::launch::async, [=](){
download(host, path, callback_word_count);
});
};
};
int main(){
auto d = Download();
// 创建回调函数, path 地址, result 结果
auto word_count = [](const std::string &path, const std::string &result) -> void{
// 输出文件路径,文件内容的长度,以及文件内容的前五个字符
std::cout << "下载完成 " << path << ": " << result.length() << " -> " << result.substr(0, 5) << std::endl;
};
// 启动多个下载任务,分别下载 novel1.txt、novel2.txt 和 novel3.txt
d.start_download("http://0.0.0.0:8080", "/novel1.txt", word_count);
d.start_download("http://0.0.0.0:8080", "/novel2.txt", word_count);
d.start_download("http://0.0.0.0:8080", "/novel3.txt", word_count);
// 主线程休眠10秒,确保所有异步线程有足够时间完成下载任务
std::this_thread::sleep_for(std::chrono::milliseconds(1000*10));
return 0;
}这里需要注意的是 std::async 的用法
它是 C++11 引入的一个标准库函数,用于启动异步任务。它接受一个可调用对象(比如函数、函数指针、Lambda 表达式等)和一些参数,并返回一个 std::future 对象,表示异步操作的结果。
语法如下
std::launch 指定任务的执行策略,如 std::launch::async 或 std::launch::deferred。前者是任务会异步启动并在独立的线程中执行后者是任务会被推迟执行,直到调用 future.get() 时,才会在当前线程中执行。
Lambda 表达式
[=] :按值捕获外部变量
[&] : 按引用捕获外部变量
在 CMakeLists 文件中添加相应语句
2
3
4
5
6
add_executable(learn_thread src/learn_thread.cpp)
# 将节点拷贝到install
install(TARGETS demo_one_node person_node learn_shared_ptr learn_lambda learn_functional learn_thread
DESTINATION lib/${PROJECT_NAME}
)
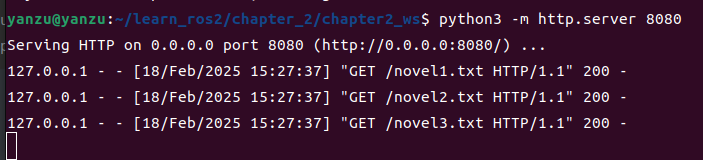
在 chapter2_ws 目录下创建三个 txt 文件,并写入简单的内容,然后在该路径下运行本地服务器,并保持打开状态
2
3
echo "第二章 hello guys" > novel2.txt
echo "第三章 hello girls" > novel3.txt
在同一路径下打开另外一个终端,编译并执行 learn_thread 节点
2
3
source install/setup.bash
ros2 run demo_one_pkg learn_thread执行后会得到如下输出